How To Make A Profitable Mitre Saws When You're Not Business-Savvy
Understanding Miter Saws: A Comprehensive Guide for Woodworkers and DIY Enthusiasts
Miter saws are vital tools in any woodworking shop or DIY enthusiast's toolbox. These precision cutting machines are developed to make accurate crosscuts and miter cuts, vital for producing picture frames, crown molding, and other elaborate woodworking projects. This article looks into the world of miter saws, exploring their types, features, and best practices to assist you take advantage of these effective tools.
What is a Miter Saw?
A miter saw is a power tool utilized primarily for making exact crosscuts and miter cuts in wood, plastic, and other products. It includes a circular saw blade mounted on a pivoting arm that can be adjusted to different angles. The workpiece is positioned versus a fixed fence, and the saw is decreased to make it. Miter saws are understood for their accuracy, speed, and flexibility, making them a preferred amongst specialists and enthusiasts alike.
Types of Miter Saws
1. Requirement Miter Saw
A basic miter saw, also understood as a standard miter saw, is the easiest type. It can make crosscuts and miter cuts at numerous angles however can not tilt the blade to make bevel cuts. This type is perfect for standard woodworking tasks and is more cost effective than other designs.
2. Compound Miter Saw
A compound miter saw can make both miter and bevel cuts. The blade can be tilted to one side, permitting more complicated cuts. This type is appropriate for tasks that require more complex angles, such as crown molding and trim work.
3. Dual-Bevel Compound Miter Saw
A dual-bevel compound miter saw can tilt the blade to both the left and right sides. This function provides higher versatility and is especially helpful for jobs that need cuts from both instructions without rearranging the workpiece. It is a bit more pricey however offers enhanced versatility.
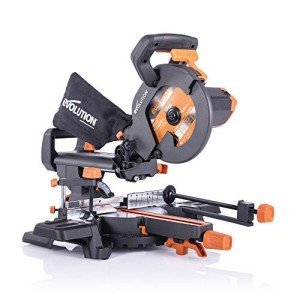
4. Sliding Compound Miter Saw
A sliding compound miter saw combines the features of a compound miter saw with a sliding mechanism. This allows the blade to move on and backward, similar to a radial arm saw, allowing longer cuts. This type is ideal for cutting larger boards and is a preferred among experts.
Secret Features to Consider
1. Blade Size
Miter saws feature various blade sizes, normally ranging from 8 inches to 12 inches. Power Tools Online enables deeper cuts and is appropriate for thicker products. However, a smaller blade size is more portable and much easier to deal with.
2. Cutting Capacity
The cutting capacity describes the optimum depth and width of the cut the saw can make. This is essential for determining the kinds of projects you can undertake. For example, a 12-inch sliding compound miter saw can manage bigger and thicker products compared to an 8-inch standard miter saw.
3. Miter and Bevel Angles
The range of miter and bevel angles the saw can accomplish is crucial for precision cuts. A lot of miter saws can make miter cuts up to 45 degrees and bevel cuts up to 45 degrees. Some designs provide micro-adjustments for even finer control.
4. Fence and Table
A strong and accurate fence and table are essential for making exact cuts. The fence ought to be stable and adjustable, while the table must be big enough to support the workpiece firmly.
5. Dust Collection System
A good dust collection system helps keep your workspace tidy and decreases the danger of injury. Look for designs with built-in dust collection or the choice to connect a shop vacuum.
6. Safety Features
Security is vital when utilizing power tools. Secret security functions consist of a blade guard, a brake system to stop the blade rapidly, and an electric brake to avoid unexpected blade motion.
Best Practices for Using a Miter Saw
1. Preparation
- Procedure and Mark: Accurately measure and mark the cutting line on your workpiece.
- Secure the Workpiece: Use secures or a vise to hold the workpiece firmly against the fence.
2. Setting the Angles
- Change the Miter Angle: Use the miter scale to set the wanted angle.
- Adjust the Bevel Angle: If using a compound miter saw, set the bevel angle as needed.
3. Making it
- Align the Blade: Ensure the blade is aligned with the cutting line.
- Lower the Blade: Slowly lower the blade into the workpiece, using consistent pressure.
- Follow Through: Complete the cut in a smooth, continuous motion.
4. Maintenance
- Tidy the Saw: Regularly clean the saw to remove sawdust and particles.
- Sharpen the Blade: Ensure the blade is sharp for tidy, exact cuts.
- Check the Fence and Table: Ensure they are clean and complimentary of any obstructions.
FAQs
1. What is the difference in between a miter cut and a bevel cut?
- Miter Cut: A miter cut is made at an angle across the width of the board.
- Bevel Cut: A bevel cut is made at an angle along the density of the board.
2. Can a basic miter saw make bevel cuts?
- No, a basic miter saw can only make crosscuts and miter cuts. For bevel cuts, you require a compound miter saw.
3. What is the very best miter saw for a novice?
- A basic miter saw is a great choice for novices due to its simplicity and affordability. It can handle many fundamental woodworking tasks.
4. How often should I sharpen the blade?
- The frequency depends upon usage, however normally, a blade should be sharpened or changed every 6-12 months for optimal performance.
5. Can I use a miter saw for cutting metal?
- While some miter saws can cut metal with the best blade, it is not suggested for regular metal cutting. A devoted metal-cutting saw is better.
Miter saws are versatile and essential tools for any woodworking project, offering precision and effectiveness. Whether you are an expert carpenter or a DIY lover, comprehending the various types of miter saws and their features will assist you pick the ideal tool for your requirements. By following best practices and preserving your saw, you can ensure accurate and safe cuts for all your tasks.
Pleased woodworking!